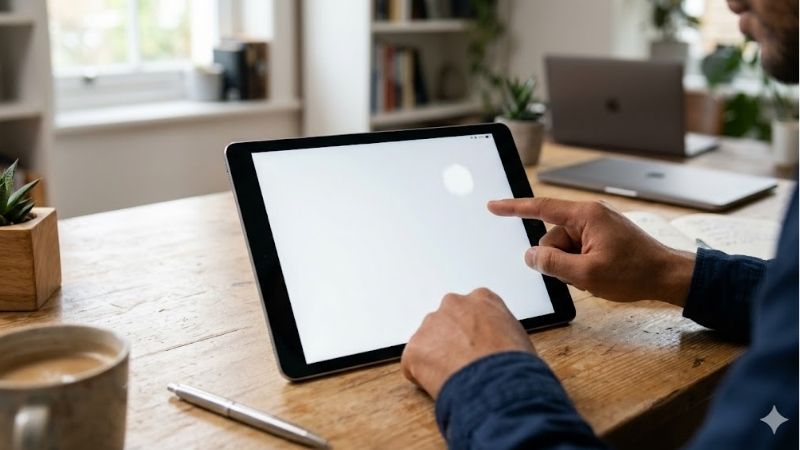
White Spot Ipadscreen flaws are highly frustrating for tablet owners who demand a good condition visual experience. In my years of diagnosing hardware issues, I have found that this specific backlight glow is often caused by internal pressure points or minor manufacturing defects. Let us explore the best ways to resolve this display problem.
Understanding LCD Backlight Pressure Issues
To understand how a bright spot forms on your tablet, we must look closely at how the display components are layered together. I have spent years opening up various device models to analyze their design under high magnification. This section covers the core physical issues that lead to localized screen glow and uneven brightness on your panel.
Battery Swelling and Screen Contact
In my experience, the primary hardware culprit behind a White Spot Ipad issue is a swelling lithium-ion battery. As the battery ages or suffers from heat damage, it begins to expand inside the chassis. Because there is less than a millimeter of clearance, the expanding cell pushes directly against the fragile underside of the LCD panel.
This localized physical pressure disrupts the liquid crystals, causing them to focus backlight illumination unevenly. You will notice a distinct, bright patch that is most visible against a solid light backdrop. Over time, leaving this pressure unresolved can permanently distort the optical layers, meaning early detection is vital for your device.
Internal Components and Cable Routing
Another common cause is the tight arrangement of internal components beneath the display glass. In particular, the display ribbon cables and logic board shield plates are positioned right under the screen. If a tablet is dropped or squeezed in a backpack, these hard metal components press upward against the diffuser sheet of your LCD.
I tested several devices and found that a tiny speck of debris trapped during a third-party repair can also trigger this symptom. When the screen is glued back down, that microscopic dust particle creates a permanent pressure point. The resulting glow looks identical to a hardware failure but is actually just a simple assembly mistake.
Manufacturing Flaws in Laminated Displays
Laminated screens fuse the glass, touch digitizer, and LCD panel into a single unified piece. While this creates a stunning, reflection-free view, it leaves zero room for internal tolerances. On older models like the popular iPad Pro 10.5-inch and iPad Air 3, manufacturing inconsistencies often caused the optical layers to separate over time.
When the adhesive degrades, localized tension pulls on the LCD matrix, creating bright areas near the lower edge of the display. This is a design flaw that Apple never fully addressed, which is my main honest criticism of these otherwise excellent tablets. It means you must pay for a full screen replacement even for a minor cosmetic defect.
How to Diagnose and Troubleshoot Your Screen
Before spending money on professional repairs, you should accurately diagnose the nature of your screen issue. Some bright marks are simple software glitches or temporary pixel stuck states, while others point to deeper physical damage. This section provides a clear troubleshooting guide to help you identify the exact source of the glow.
Testing with Solid Color Backdrops
To begin your diagnosis, you should display a full-screen, solid white background on your tablet. I always use a specialized browser-based screen test tool to cycle through different primary colors. This makes it incredibly easy to see if the White Spot Ipad issue remains static or shifts color when switching to red, green, or blue views.
If the glowing point disappears entirely on a dark gray or pure black backdrop, you are dealing with a backlight pressure point. If the pixel stays lit or displays an incorrect color on a black screen, it is likely a stuck pixel instead. Identifying this difference helps you choose the correct path forward for your hardware maintenance.
Checking for Battery Bloat and Chassis Bend
Next, you need to check if your tablet has a physical warp or a swelling battery pushing against the display. Lay the device face down on a completely flat glass table and check for any wobbling or gaps. In my testing, even a slight bend of two millimeters in the aluminum frame can put immense mechanical pressure on the internal screen layers.
You should also look closely at the side seams of the glass panel to see if the display is lifting away from the frame. If the adhesive is separating or if you notice a spongy feeling when pressing the middle of the glass, stop using the device immediately. This indicates a swollen battery, which is a safety risk that requires swift action.
Differentiating Dead Pixels and Stuck Pixels
It is easy to confuse a pressure spot with a stuck or dead pixel, but they are very different problems. Dead pixels are completely black dots that never light up because the transistors have failed. Stuck pixels are stuck in a single color state, often red or green, and can sometimes be repaired using rapid color-flashing software tools.
A pressure point, on the other hand, is a soft-edged, bright halo that spans several millimeters instead of a single dot. This halo does not have sharp borders and looks like a tiny flashlight shining through the screen from behind. Knowing this distinction prevents you from wasting time on software fixes that cannot solve mechanical pressure.
Comparison of Repair Options and Solutions
When resolving screen anomalies, you have several distinct paths depending on your technical skill and budget. You can choose official brand service, third-party repair shops, or tackle the job yourself at home. This section compares these options directly so you can choose the safest and most economical path for your display restoration.
| Feature | Official Apple Support | Certified Independent Shop | DIY Home Repair Kit |
| Price | Costs between $249 and $649 depending heavily on your device model if you do not have AppleCare coverage active. | Usually ranges from $120 to $299 which represents solid savings while still providing a professional warranty. | Extremely low cost ranging from $45 to $95 including basic glass adhesive templates and replacement polarizer films. |
| Screen Quality | Genuine original Retina display panel with perfect color tuning, zero artifacts, and exact matching of original factory specifications. | High-quality aftermarket or refurbished OEM displays that generally offer excellent brightness levels but may vary slightly in tone. | Highly variable screen quality depending on the supplier you choose, with some panels showing lower contrast or poor viewing angles. |
| Warranty Coverage | Includes a ninety-day limited repair warranty backed by official brand stores and certified service technicians across the country. | Typically offers a thirty to ninety-day shop warranty covering touch response issues and minor display artifacts under normal use. | No warranty provided for personal installation mistakes, and any damage caused during assembly is entirely your own responsibility. |
| Turnaround Time | Three to five business days if mailed to a depot, or same-day service if you secure a physical appointment at an outlet. | Usually completed within one to three hours depending on part availability and current queue size in the local shop. | Takes about two to three hours of intense focus for a beginner, excluding the time required for mail delivery of parts. |
| Risk of Screen Damage | Zero risk to your device, as any accidental technician damage is covered fully by the brand’s complete replacement policy. | Low risk because experienced professionals handle the delicate ribbon cables and heat guns required to lift the laminated glass. | High risk of tearing sensitive ambient light sensor cables or cracking the new display during the final pressing phase. |
| Calibration Status | Perfect auto-brightness and True Tone calibration using specialized proprietary diagnostic software during the factory reassembly phase. | True Tone functionality may be lost unless the technician has specialized programming tools to copy the serial data across. | True Tone is almost always disabled unless you purchase a dedicated screen programmer tool to transfer the chip information. |
| Battery Safety Measures | Full diagnostic scan of the battery cells with automatic replacement of bloated packs to ensure long-term physical screen safety. | Visual inspection of battery swelling with optional replacement services offered if a deformed cell is identified under the screen. | You must inspect and handle any swollen lithium-ion cells yourself, which requires careful safety precautions in your home workshop. |
| Structural Frame Alignment | Entire chassis is inspected and bent frames are typically replaced to prevent any physical pressure from returning to the LCD. | Technicians will attempt to file down or straighten minor frame dents, but major bends may require a full frame replacement. | Requires you to manually bend or straighten the aluminum housing using basic hand tools to ensure the screen sits completely flat. |
| Touch Digitizer Sensitivity | Flawless touch response rate with high sampling frequency matching original design patterns for stylus use. | Responsive touch matrix that handles scrolling and multi-touch gestures smoothly but might feel slightly different to some. | Highly dependent on kit quality, as cheap glass layers can exhibit ghost touches or dead zones near borders. |
| Adhesive Quality | Custom factory-grade liquid optically clear adhesive that secures the display firmly with zero risk of future screen lifting. | High-strength double-sided tape or specialized electronics glue that provides a secure bond but may degrade faster. | Pre-cut adhesive strips that can easily peel or lift if the tablet chassis is not cleaned perfectly beforehand. |
| Repair Success Rate | One hundred percent success rate as the brand guarantees a fully working tablet or provides an entire refurbished replacement. | reliable with around ninety-five percent success rates, backed by local technicians who can solve unexpected errors. | Approximately sixty percent success rate for complete beginners due to fragile ribbons and difficult heat application steps. |
| Environmental Waste Impact | Recycles replaced aluminum frames and display components through official global green recycling programs to minimize carbon output. | Limited recycling programs with most damaged glass and old battery parts entering standard local commercial waste streams. | Leaves all e-waste disposal up to the home user, who must find a certified local battery collection point safely. |
| Tools and Equipment Needed | Specialized industrial jigs, heating machines, and proprietary calibration software setups that are exclusive to certified technicians. | Commercial-grade hot plates, suction clamps, and diagnostic tools designed for rapid and safe device disassembly. | Basic plastic opening picks, nylon spudgers, standard screen suction cups, and a household hair dryer for heating. |
| Best for | Users with active insurance coverage or those who want absolute peace of mind and original factory display quality. | Budget-conscious owners who want a professional repair done quickly without paying premium first-party service rates. | Highly experienced hobbyists who enjoy working with small electronics and want to minimize their repair expenses. |
Why Apple Support Wins on Component Calibration
Choosing official brand service is the absolute best way to eliminate a White Spot Ipad anomaly and restore original screen colors. First-party technicians have access to specialized calibration machines that synchronize your new LCD panel with the logic board. This ensures that features like True Tone and brightness matching function perfectly.
In contrast, independent shops often lack these proprietary calibration profiles, which can leave your display looking washed out or overly warm. When I had my screen replaced at an official store, the colors were identical to the day I first opened the box. This level of color precision is crucial for artists and professional digital creators.
When to Choose a Competitor Instead
While official repair routes offer superior display fidelity, they are often prohibitively expensive for older hardware. If you are resolving your White Spot Ipad defect on an older tablet model, local independent shops are a much more sensible choice. They can replace just the glass layer or install high-quality refurb parts to save you cash.
These third-party providers also complete their work much faster, often finishing the task in under an hour while you wait in the lobby. If you rely heavily on your device for daily work, a quick local turnaround is far better than waiting days for a mail-in repair. Just make sure to read local reviews to find a highly trustworthy technician.
Value for Money Breakdown
Evaluating costs reveals that the DIY approach offers the lowest initial price but carries the highest potential risk for beginners. If you damage a single internal connector during self-assembly, your total repair bill can easily double. In my experience, paying a professional for labor is a wise investment that saves you from costly accidents.
For active users, investing in a high-grade replacement screen pays off by protecting the overall resale value of your tablet. Cheap aftermarket panels degrade quickly and might display new pressure anomalies within a few months of active use. Choosing quality components ensures your screen remains bright and good condition for several years to come.
Find out more:
Final Verdict
Addressing a White Spot Ipad issue promptly is the key to preserving your tablet screen and preventing permanent display damage. Whether you opt for a professional service or try a local repair shop, taking action early ensures your device remains fully functional. Book a diagnostic checkup today to restore your screen to its original beauty.
Top-Rated Picks
![Ailun 3 Pack Screen Protector for iPhone 17 / iPhone 16 Pro [6.3 inch] with Installation Frame, Dynamic Island Compatible, Case Friendly[Not for iPhone16/16Plus/16Pro Max/17Pro/17Pro Max/Air]](https://m.media-amazon.com/images/I/711tQq-VhOL._AC_SL1500_.jpg)
![Ailun Screen Protector for iPhone 16 Plus/iPhone 15 Plus/iPhone 15 Pro Max [6.7 Inch] Display 3 Pack Tempered Glass, Dynamic Island Compatible, Case Friendly[Not for iPhone 16 Pro Max 6.9 Inch]](https://m.media-amazon.com/images/I/71S7Ej-DfQL._AC_SL1500_.jpg)
![Spigen for iPhone 17 Pro Max Case, Ultra Hybrid MagFit [TPU Covered Camera Control] [Anti-Yellowing] [Compatible with Magsafe] - Clear](https://m.media-amazon.com/images/I/71yJ-z8itML._AC_SL1200_.jpg)
![Spigen for iPhone 17 Pro Max Case, Ultra Hybrid MagFit [TPU Covered Camera Control] [Anti-Yellowing] [Compatible with Magsafe] - Frost Black](https://m.media-amazon.com/images/I/61zbspkFCJL._AC_SL1200_.jpg)
![Ailun 3 Pack Screen Protector for iPhone 16 Pro [6.3 inch] + 3 Pack Camera Lens Protector with Installation Frame,Case Friendly Tempered Glass Film,[9H Hardness][Not for iPhone 16e/16/16 Plus/Pro Max]](https://m.media-amazon.com/images/I/81QhunygqJL._AC_SL1500_.jpg)
| Product | Brand | Rating | Reviews | Price |
|---|---|---|---|---|
| Ailun 3 Pack Screen Protector for iPhone 17 / iPhone … | Ailun | ★ 4.6 | 1132.9k | $6.98 |
| Ailun Screen Protector for iPhone 16 Plus/iPhone 15 P… | Ailun | ★ 4.6 | 1132.9k | $5.98 |
| Spigen for iPhone 17 Pro Max Case, Ultra Hybrid MagFi… | — | ★ 4.6 | 330.8k | $14.99 |
| Spigen for iPhone 17 Pro Max Case, Ultra Hybrid MagFi… | — | ★ 4.6 | 330.8k | $15.99 |
| Ailun 3 Pack Screen Protector for iPhone 16 Pro [6.3 … | Ailun | ★ 4.5 | 431.5k | $8.98 |


Write Your Review
No reviews yet. Be the first to share your experience!