
Setting up an iPad keyboard should take only a few minutes, but a rushed setup can create frustrating problems: the keyboard may not appear in Bluetooth settings, letters may produce the wrong symbols, or the iPad may keep switching between the on-screen and physical keyboards. A case-mounted keyboard can also sit unevenly, putting pressure on the iPad or blocking its charging port. The steps below explain how to set up an iPad keyboard in 2026, whether you have a Bluetooth model, a keyboard case, or a wired USB keyboard.
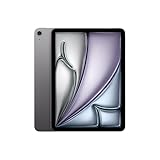
Quick answer: Our top pick in 2026 is the iPad with a charged battery — our #1 rated choice. See the full ranked comparison, alternatives and buying advice below.
What You Need
| Item | Why | Optional? |
|---|---|---|
| iPad with a charged battery | The iPad needs enough power to complete pairing and install any pending software updates. | No |
| Compatible keyboard | A Bluetooth keyboard, keyboard case, or USB keyboard provides the physical keys. | No |
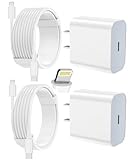
| Charging cable or fresh batteries | Rechargeable keyboards must be switched on and charged. Battery-powered models may need new cells. | No, if the keyboard is already charged |
| Apple ID password | You may need it if the iPad requests an update or changes certain settings. | Usually |
| USB-C adapter or hub | It connects a wired USB-A keyboard to an iPad with a USB-C port. | Only for some wired keyboards |
| Stable surface | A desk or table helps keep a keyboard case aligned and prevents accidental drops during setup. | No |
Most compact Bluetooth keyboard and mouse combinations work with iPadOS when the keyboard supports standard Bluetooth input. Basic universal sets are often priced around $10 to $30; for example, some slim keyboard-and-mouse combos are listed at $9.99. Before buying, confirm that the listing specifically names iPad or iPadOS compatibility. Also check whether the set uses Bluetooth or a USB receiver. A keyboard that requires a receiver may need an adapter, and some receivers are not supported by every iPad.
As an Amazon Associate we earn from qualifying purchases at no extra cost to you. Product prices and availability are accurate as of the date shown and are subject to change.


Step-by-Step
-
Check the iPad and keyboard — about 2 minutes
Turn on the iPad and open Settings to check for an available software update under General > Software Update. An update is not always required, but current iPadOS can improve accessory compatibility. Confirm that the keyboard has power. For a rechargeable model, connect its charging cable and allow it to charge according to the manufacturer’s instructions. If it uses replaceable batteries, install the correct type and check the polarity markings.
Place the keyboard within about 3 feet of the iPad during pairing. Move other unused Bluetooth devices away temporarily so you select the correct keyboard from the device list.
-
Turn on Bluetooth — about 30 seconds
On the iPad, go to Settings > Bluetooth, then turn Bluetooth on. You can also open Control Center and tap the Bluetooth icon, but the Settings app is better for completing the pairing process because it shows the full list of available devices.
Keep the Bluetooth screen open. If the keyboard has a separate Bluetooth button, press it once. If it has a pairing switch or key combination, follow the printed instructions. A blinking indicator light usually means the keyboard is discoverable. A steady light may mean it is already connected to another device.
-
Put the keyboard in pairing mode — 1 to 2 minutes
Look for a button labeled Bluetooth, Connect, or Pair. On some keyboards, you must hold the button for 3 to 5 seconds. Others use a function key with a Bluetooth symbol. If the keyboard has multiple device channels, such as 1, 2, or 3, select an unused channel before holding the pairing button.
Do not repeatedly press the button if the keyboard does not appear immediately. Wait up to 30 seconds, then switch the keyboard off and on and try again. If it was previously connected to a phone, computer, or another tablet, turn Bluetooth off on that device or remove the keyboard from its Bluetooth list.
-
Select the keyboard on the iPad — about 1 minute
Under Other Devices on the iPad’s Bluetooth screen, tap the keyboard’s name. The name may be a brand, model number, or generic label such as “Bluetooth Keyboard.” If the iPad displays a code, type that code on the physical keyboard and press Return or Enter. This step is easy to miss because the code appears on the iPad while the response must be entered on the keyboard.
After pairing, the keyboard should move to My Devices and show Connected. Open a note or search field and type several letters, numbers, and punctuation marks to confirm that it works.
-
Choose the correct keyboard layout — 2 minutes
If the keys produce unexpected symbols, open Settings > General > Keyboard > Hardware Keyboard. Choose the layout that matches the physical keys, such as U.S. or another regional layout. A QWERTY keyboard set to the wrong region may swap punctuation marks or place symbols in different locations.
You can also adjust modifier keys in the same area. For example, the Caps Lock, Control, Option, and Command keys can be reassigned on compatible keyboards. Leave the default settings in place unless a shortcut is not behaving as expected.
-
Test shortcuts and the on-screen keyboard — 2 minutes
Test common commands such as Command-C to copy, Command-V to paste, and the arrow keys for moving through text. Press the keyboard’s eject or keyboard key, if it has one, to see whether the on-screen keyboard appears. You can also tap the keyboard icon in the lower-right corner of a text field when available.
If you use a keyboard case, gently adjust the viewing angle and verify that the iPad is held securely. Do not force the tablet into a hinge or slot. Check that the camera, speakers, charging port, and volume buttons remain accessible.
-
Connect a wired keyboard, if applicable — 2 to 5 minutes
For a USB-C iPad, plug a compatible USB-C keyboard directly into the port. A USB-A keyboard needs a USB-C adapter or hub. Older iPads with a Lightning port may require a Lightning-to-USB adapter, and some accessories may need additional power.
Once connected, open a text field and test the keys. If the iPad does not recognize the keyboard, disconnect it, unlock the iPad, and reconnect it. Avoid hubs with unnecessary accessories attached, since a power-hungry device can exceed what the iPad supplies through the port.
Mistakes to Avoid
- Pairing with the wrong device: Turn off Bluetooth on nearby phones and computers if the keyboard keeps reconnecting elsewhere.
- Ignoring the pairing code: When a code appears, type it on the physical keyboard, not on the iPad’s screen.
- Using the wrong layout: Set the hardware keyboard to match the printed key arrangement.
- Leaving the keyboard in pairing mode: After setup, exit pairing mode to reduce accidental connections and preserve battery life.
- Assuming every USB receiver works: A wireless keyboard with a dedicated receiver may require the correct adapter and sufficient power.
- Forcing a keyboard case: If the case does not align naturally, it may be made for a different iPad size or generation.
- Skipping basic troubleshooting: Restart the iPad, charge the keyboard, and try pairing again before buying a replacement.
How Often
You generally need to pair a Bluetooth keyboard only once. After that, it should reconnect automatically when Bluetooth is on and the keyboard is powered up. Charge a rechargeable keyboard when its indicator shows low power or when keystrokes begin lagging. Depending on use, that may be every few days or every several weeks. For a keyboard with disposable batteries, replace them when the connection becomes inconsistent or the keyboard stops responding.
Once a month, wipe the keys and check the charging cable, battery compartment, and case hinges. Keep liquids away from the keyboard, and do not use spray cleaner directly on it. If you frequently travel, disconnect the keyboard before packing the iPad and store both pieces so pressure is not placed on the screen.
When to Call a Pro or Replace
Most keyboard pairing problems do not require professional service. Contact Apple Support or an authorized repair provider if the iPad’s Bluetooth repeatedly fails with several known-working accessories, the charging port is loose or damaged, or the iPad has suffered liquid or impact damage.
Replace the keyboard when it will not power on after charging or new batteries, has missing or swollen keys, develops repeated input after cleaning, or loses connection with multiple compatible devices. A replacement is also sensible when the battery no longer holds enough charge for your routine. Before buying, verify the iPad model, port type, keyboard layout, operating-system compatibility, and whether the accessory includes a charging cable or adapter.
FAQ
Why is my iPad not finding my Bluetooth keyboard?
Make sure the keyboard is charged, switched on, and in pairing mode. Move it close to the iPad, turn Bluetooth off and back on, and disconnect the keyboard from other nearby devices. If it still does not appear, restart both devices and try again.
How do I make the on-screen keyboard appear?
Tap inside a text field, then tap the keyboard icon in the lower-right corner if it appears. On some keyboards, pressing the eject or keyboard key hides or displays the on-screen keyboard. You can also turn off or disconnect the physical keyboard temporarily.
Can I use a keyboard and mouse together with an iPad?
Yes. Pair the keyboard first, then open Settings > Bluetooth and pair the mouse. If both accessories use separate Bluetooth connections, they can typically operate at the same time. A combo that uses one USB receiver may need a compatible adapter or hub.
How do I forget an old keyboard?
Open Settings > Bluetooth, tap the information button next to the keyboard name, and choose Forget This Device. Confirm the choice, then place the keyboard in pairing mode if you want to connect it again.
Ready to decide? Our #1 pick for 2026 is the iPad with a charged battery.
Live price & availability on Amazon.




Write Your Review
No reviews yet. Be the first to share your experience!