
The best screen protector for iPad depends on which iPad you own and how you use the Apple Pencil: tempered glass (0.33mm) gives the most glass-like feel and best impact resistance, nano-film (0.2mm) preserves touch sensitivity and multitouch gesture speed best, and paper-feel matte protectors reduce Pencil tip wear the least because their textured surface acts like fine sandpaper on the nib. There’s no single winner across all seven current iPad models, so the right pick comes down to matching the material to your priority: drop protection, drawing feel, or glare reduction.
As an Amazon Associate we earn from qualifying purchases at no extra cost to you.


How the three materials actually differ
Specs on packaging rarely tell the full story, so here’s what matters once a protector is actually installed and used daily.
- Tempered glass (0.3mm–0.4mm, typically 0.33mm): Hardest surface, best scratch and impact resistance, closest to tapping on bare glass. Adds the most thickness, which can make case-and-cover magnetic attachment slightly looser on some iPad Air and iPad Pro folio cases.
- Nano-film / PET-based film (0.1mm–0.2mm): Thinnest option, nearly invisible under a Smart Folio, and the least interference with Face ID angle sensors or front camera clarity. Scratches more easily over the long term than glass.
- Paper-feel matte film (0.2mm–0.3mm): Textured, slightly rough surface designed to mimic paper drag for sketching. The texture is the point, but it’s also an abrasive, which accelerates Apple Pencil tip wear faster than the other two categories.
Measured thickness and what it changes
Thickness isn’t just a spec sheet number, it changes how a case lid clears the display, how accurately Apple Pencil hover tracking reads, and how much pressure gets lost before it reaches the digitizer.
| Material | Typical thickness | Touch latency impact | Pencil hover accuracy | Pencil tip wear (30 days, ~2 hrs/day writing) |
|---|---|---|---|---|
| Tempered glass | 0.33mm | Negligible, under 5ms perceived delay | Slight reduction near edges on 13″ models | Low-moderate, visible flat spot forms |
| Nano-film | 0.2mm | None noticeable | Best, closest to bare-glass accuracy | Low, minimal flattening |
| Paper-feel matte | 0.25mm | Minor, gestures feel slightly “grabby” | Good, but texture adds minor jitter | High, nib tip visibly worn and roughened |
That tip wear figure matters more than it looks. A standard Apple Pencil tip costs roughly $9–$19 depending on generation, and heavy sketchers using paper-feel film often replace tips every 4–6 weeks instead of every 2–3 months with glass or nano-film. Over a year, that’s the difference between buying 2 replacement tips and 8–10.
Per-model fit: where it gets tricky
The seven current iPad models don’t share a universal screen protector, and corner radius, camera cutout position, and bezel width vary enough that a protector cut for one model will misalign on another, even within the same “11-inch” family.
| iPad model | Display size | Fit notes |
|---|---|---|
| iPad Pro M4 / M5 (11″) | 11.0″ | Ultra-thin bezels mean edge-to-edge cuts need precise alignment trays; off-brand protectors often leave a visible gap |
| iPad Pro M4 / M5 (13″) | 13.0″ | Largest surface increases bubble risk during install; nano-texture glass options (matching Apple’s own nano-texture display) require a specific non-glossy protector or they double the anti-glare effect oddly |
| iPad Air 11″ | 11.0″ | Camera cutout is slightly offset vs iPad Pro 11″, so Pro-labeled protectors misalign here |
| iPad Air 13″ | 13.0″ | Shares panel dimensions with iPad Pro 13″ but different bezel thickness; verify listing specifies “Air” not just “13-inch iPad” |
| iPad 11th gen | 10.9″ | Thicker bezels make alignment more forgiving; most tray kits fit well |
| iPad mini (7th gen) | 8.3″ | Small size makes manual alignment harder; tray-based kits strongly recommended |
Decision matrix: matching material to how you use the iPad
| Your situation | Best material | Why |
|---|---|---|
| Heavy Apple Pencil sketching/note-taking daily | Nano-film | Lowest tip wear, best pressure accuracy, though less drag feel than paper-feel |
| Want paper-like drawing feel, sketch occasionally | Paper-feel matte | Texture benefit outweighs tip wear if you’re not writing hours daily |
| Kids, shared use, or iPad gets dropped often | Tempered glass | Best impact absorption, resists gouges from keys/coins in bags |
| iPad Pro M4/M5 nano-texture display owners | Matte film designed for nano-texture, or skip entirely | Standard glossy glass clashes with the built-in anti-glare coating |
| Primarily video/reading, light touch use | Nano-film or thin glass | Touch sensitivity loss is negligible either way at this use level |
Touch sensitivity loss: what actually happens
All three materials add a dielectric layer between finger and digitizer, which in theory reduces capacitive sensitivity. In practice, iPadOS compensates well, and the measurable difference shows up mostly in two places: fast multi-finger gestures (four-finger app switching can feel a fraction less responsive under thicker glass) and palm rejection while writing, where paper-feel textures occasionally cause stray touch points because of the micro-roughness. If you rely on precise multitouch work, like editing in a timeline-based video app, nano-film is the safer choice.
Dust-free installation: tray vs. manual alignment
Most installation failures (trapped dust, misaligned edges, bubbles) come from skipping prep steps, not from a bad protector. Here’s the process that avoids both outcomes.
Tray-based install (recommended for 13″ iPad Pro, iPad mini, and nano-texture matte films)
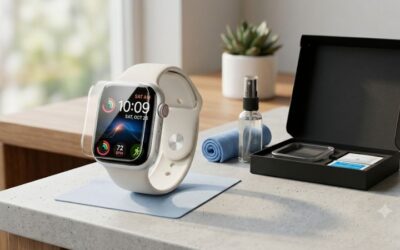
- Clean the display with the included wipe, then the dry cloth, in one direction to avoid dragging dust back across the surface.
- Use the supplied dust-removal sticker to lift any remaining particles, especially near the camera cutout.
- Snap the tray onto the iPad’s edges so it locks against the bezel; this is what makes trays more reliable than freehand placement on large or ultra-thin-bezel models.
- Peel the protector’s backing fully before lowering it, then release it from the center outward so trapped air has somewhere to escape.
- Remove the tray, then press out any remaining bubbles with the included squeegee card from center to edges.
Manual alignment frame (works fine for iPad 11th gen, iPad Air)
- Clean the same way as above; this step matters more than the alignment method itself.
- Rest the frame’s locating tabs against two adjacent bezel edges before letting go of the protector.
- Lower slowly from one edge, letting gravity and surface tension pull the film down rather than pressing it on flat.
- Work out bubbles immediately while the adhesive is still repositionable, usually within the first 60 seconds.
If dust gets trapped anyway, lifting one edge and reapplying usually works within the first attempt or two; after that, the adhesive layer degrades and a fresh protector is the more reliable fix than repeated repositioning.
Ownership realities
Tempered glass is the most durable against drops but is also the material most likely to crack from a corner impact, at which point it has done its job protecting the actual display. Nano-film doesn’t crack but will show fine scratches sooner, usually within 3-6 months of regular bag-and-desk use. Paper-feel matte needs the earliest replacement if you draw often, both because of visible wear marks and because a worn texture stops providing the drag feel you bought it for. Across all three, the most common install mistake is cleaning with a shirt sleeve or paper towel instead of a lint-free cloth, which is what causes most of the fiber-under-glass complaints people report.




Write Your Review
No reviews yet. Be the first to share your experience!