
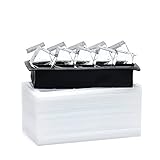
- Top Pick: True Cubes Crystal Clear Ice Cube Maker, 4 Large 2"x2"x2" Ice Cubes for Cocktails and Drinks, Silicone Mold for Pure, Bartender-Quality Ice – Great for Hosting and Entertaining, Whiskey Gifts for Men
- Best Value: Clear Ice Cube Maker Tray – 2 Inch Clear Ice Cube Silicone Mold,10 Large Crystal Ice Cubes for Whiskey and Cocktail
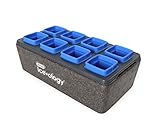
- Premium Choice: ClearlyFrozen® High Capacity Ice Tray Molds Crystal Clear 1.3” & 2” Cubes
To make clear ice at home, freeze filtered water slowly in an insulated cooler, remove the cloudy lower section, and store the transparent pieces in a sealed bag; this directional-freezing method is more reliable than ordinary ice trays or most decorative molds.
As an Amazon Associate we earn from qualifying purchases at no extra cost to you.


Why Homemade Ice Turns Cloudy
Cloudiness comes mainly from dissolved air, minerals, and impurities being pushed into a shrinking pocket of liquid as water freezes. A standard ice tray freezes from every exposed surface at once, trapping that pocket in the middle. Clear ice is made by controlling where freezing begins and where the remaining cloudy water ends up.
There are three practical approaches:
- Insulated cooler: freezes from the top downward and produces the clearest, largest blocks. It offers the best quality but requires cutting.
- Directional-freezing mold: uses insulation or a removable reservoir to guide freezing in one direction. It is cleaner and easier than a cooler, but capacity is usually smaller.
- Ordinary silicone mold: is inexpensive and convenient, but does not reliably prevent internal cloudiness. It is suitable when appearance matters less than convenience.
Which Clear-Ice Method Fits Your Kitchen?
| Method | Typical output | Time at -18°C freezer | Approximate cost range | Best for |
|---|---|---|---|---|
| Insulated food-safe cooler | 1 block, about 15 × 15 × 10 cm; 2–3.5 kg | 24–36 hours | $20–$60 for a suitable small cooler | Maximum clarity and large cocktail cubes |
| Directional-freezing mold | 2–4 cubes, usually 5–6 cm wide | 18–30 hours | $15–$45 | Regular home use with less cutting |
| Insulated sphere mold | 1 sphere, usually 6–7 cm diameter | 24–36 hours | $15–$35 | One drink at a time and attractive presentation |
| Standard silicone tray | 8–16 small cubes; 20–30 g each | 4–8 hours | $5–$20 | Low cost and fast chilling, not maximum clarity |
The cooler is the strongest choice if you want large, nearly transparent blocks and do not mind a short preparation step. A directional mold is a better fit for a small freezer, frequent use, or anyone who wants finished pieces without sawing a block apart. Choose a standard tray only if “clear enough” is acceptable.
How to Make Clear Ice at Home With a Cooler
1. Choose the container and water
Use a small, clean, food-safe insulated cooler that fits inside your freezer with its lid removed or loosely placed. A 2–4 litre cooler is practical for most home freezers. Avoid a cooler with exposed fabric, damaged plastic, or a strong odor.
Use filtered water with low mineral content. Reverse-osmosis water is a good option, but ordinary carbon-filtered tap water can work well. Distilled water is not essential; water purity helps, but directional freezing is the main factor.
2. Measure the fill level
Pour in enough water to leave at least 2 cm of headspace for expansion. For a 2 litre cooler, this usually means 1.7–1.8 litres of water. Do not fill to the rim, because expanding ice can distort the container or lift the lid.
Let hot water cool to room temperature before freezing. Boiling water does not automatically produce clear ice, and placing very hot water in a plastic cooler can damage it or create a burn hazard.
3. Freeze from one direction
Place the open cooler level in the freezer. Leave the top uncovered or use a lid that does not seal tightly; the goal is to keep the side and bottom insulated while allowing the top surface to freeze first. Set the freezer near 0°F (-18°C) and freeze for approximately 24 hours.
Check the block rather than relying only on the clock. The top and sides should be solid, while a layer of liquid or cloudy slush should remain underneath. If the entire container is frozen solid, the cloudy section may be trapped inside. If the center is still mostly liquid, return it to the freezer for another 4–6 hours.
4. Remove and temper the block
Take the cooler out and leave it on the counter for 5–10 minutes. Turn it upside down over a clean cutting board. If the block does not release, briefly run lukewarm—not hot—water over the outside of the cooler for 10–20 seconds.
Do not pour hot water directly onto the ice. A sudden temperature change can crack the block unpredictably and may send sharp fragments toward your hands.
5. Separate the clear section
The clear ice is usually the upper portion, while the cloudy water is at the bottom. Mark a cutting line just above the cloudy area. Use a serrated bread knife to score a shallow groove around the block, then tap the back of the knife gently with a mallet or the handle of another utensil. Work slowly and keep both hands away from the blade path.
For thick blocks, a purpose-made ice pick or clean, dedicated chisel gives more control, but it also increases the risk of slipping. Do not use power tools, dirty household chisels, or glass-cutting techniques. Discard the cloudy section or allow it to melt for ordinary cooling ice.
6. Shape the pieces
Cut the clear block into cubes about 5 cm wide for a rocks glass. Score each intended line first, then tap gradually. Slightly rounded corners are safer and less likely to chip than perfectly sharp corners.
A 15 × 15 × 10 cm block has a theoretical volume of 2.25 litres. Because some water remains cloudy and some is lost during cutting, expect approximately 1.4–1.8 kg of usable clear ice, or about 9–14 cubes weighing 100–130 g each.
Using a Directional-Freezing Mold
Directional molds generally have an insulated outer shell and a smaller inner cavity. Fill the inner cavity to its marked line, assemble the mold, and place it upright on a level shelf. Follow the manufacturer’s fill limit rather than filling every visible space, since trapped expansion can split the mold.
Freeze for 18–30 hours at -18°C. Remove the outer insulation first, then release each cube using a short rinse of cool-to-lukewarm water. Do not force a frozen cube with a knife against the mold wall. Silicone can tear around thin corners, and rigid plastic can crack if twisted while deeply frozen.
Directional molds are less wasteful than coolers, but their results vary. A mold with thicker insulation and a one-way freezing path generally performs better than a thin silicone tray with a decorative shape. If the top surface is clear but the bottom remains cloudy, extend the freeze time slightly and confirm that the mold is level.
Water, Freezing, and Storage Rules That Matter
- Filter first: sediment and strong mineral taste remain noticeable in slow-melting ice.
- Keep the freezer stable: repeated door opening increases freezing time and can create irregular layers.
- Do not overfill: leave roughly 10% of the container empty for expansion.
- Temper before cutting: a 5–10 minute rest reduces sudden cracking without allowing the block to melt significantly.
- Dry before storage: pat pieces dry with a clean, lint-free towel to prevent them freezing together.
- Use an airtight bag or container: clear ice absorbs freezer odors easily. Press excess air from a freezer bag and seal it.
- Label the date: use stored ice within about 2–4 weeks for the best flavor and appearance.
Cleaning and Ownership Realities
Wash a cooler or mold with warm water and unscented dish soap after every batch. Rinse thoroughly and air-dry completely before storing. Do not use abrasive pads on silicone, since roughened surfaces collect residue. For persistent odors, soak the clean container in a solution of one tablespoon of baking soda per litre of warm water, then rinse.
The parts most likely to wear out are thin silicone corners, snap-fit lids, and insulation that has absorbed odors. Replace a mold if it develops cracks, sticky surfaces, leaks, or a persistent smell. Never use a container that has warped enough to make its lid or base unstable in the freezer.
For occasional drinks, a $5–$20 standard tray is the economical choice. For weekly use, a $15–$45 directional mold usually reduces waste and effort. A small cooler costs more in preparation time, but it produces the largest and clearest pieces and is the best method when visual clarity and slow melting are the priority.
Quick Decision Guide
| Your situation | Recommended choice | Reason |
|---|---|---|
| Small freezer or limited counter space | Directional mold | Compact storage and no block cutting |
| Lowest budget | Standard silicone tray | Low entry cost, with less consistent clarity |
| First attempt at clear ice | Directional mold | Fewer cutting and handling steps |
| Several cocktails or large-format presentation | Insulated cooler | Largest yield and most control over cube size |
| Irregular or cloudy results | Improve water, level, and timing first | Technique usually matters more than buying a larger mold |
The most dependable formula is simple: low-mineral water, one-way freezing, partial freezing rather than freezing the entire volume, careful separation of the cloudy layer, and airtight storage. If you want the clearest result, start with a small insulated cooler; if you want repeatable convenience, choose a directional-freezing mold.
Ready to decide? Our #1 pick for 2026 is the Insulated food-safe cooler.
Live price & availability on Amazon.


Write Your Review
No reviews yet. Be the first to share your experience!