
AirPods charging problems usually come from a dirty charging contact, a depleted case, a damaged cable, or software that has stopped reporting the battery correctly. The fix is often simple, but rushing can make the problem worse: metal tools may scratch contacts, liquid can corrode the case, and forcing an AirPod into a blocked slot can damage the charging pins. This guide explains how to fix AirPods charging issues safely, whether one earbud is stuck at 0%, the case will not charge, or the status light seems unresponsive.
Before you begin, remove both AirPods from your ears and work on a clean, dry surface. Set aside about 15 to 30 minutes for basic troubleshooting. If an AirPod or its case becomes unusually hot, smells burnt, swells, or shows signs of liquid damage, stop using it immediately.
As an Amazon Associate we earn from qualifying purchases at no extra cost to you. Product prices and availability are accurate as of the date shown and are subject to change.

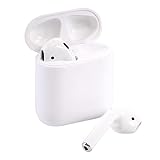
Quick answer: Our top pick in 2026 is the Apple-certified Lightning or USB-C charging cable — our #1 rated choice. See the full ranked comparison, alternatives and buying advice below.
What You Need
| Item | Why | Optional? |
|---|---|---|
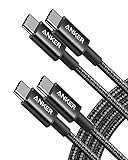
| Apple-certified Lightning or USB-C charging cable | Tests whether the cable, rather than the case, is causing the problem | No |
| USB power adapter rated at 5 watts or higher | Provides steady power for testing; a 10W, 12W, or 20W adapter is also generally suitable | No |
| Soft, dry, lint-free cloth | Removes dust and skin oils from the case exterior and charging surfaces | No |
| Dry, soft-bristled brush | Loosens lint from the case’s charging wells and connector port | Optional |
| Another compatible charging cable or pad | Helps isolate a failed cable, adapter, or wireless charger | Optional |
| Replacement charging case | A practical option when the case battery or charging hardware has failed | Optional |
For reference, a renewed replacement charging case may cost about $15 to $30, while renewed AirPods with a charging case commonly cost roughly $75 to $100, depending on the generation and seller. Confirm compatibility before buying: AirPods cases are not universally interchangeable across every model and generation.
Step-by-Step
1. Check the charging symptoms (2 minutes)
Place both AirPods in the case, close the lid, and wait 30 seconds. Open the lid near your iPhone or iPad and check the battery card. You can also check the Batteries widget or Bluetooth settings. Note whether the problem affects one AirPod, both AirPods, or the case itself.
If the case status light does not turn on, connect the case to power before assuming it is defective. If only one earbud remains at a low percentage, focus first on that earbud’s charging well and contact.
2. Charge the case from a reliable source (10 to 15 minutes)
Connect the case to a known-good cable and a wall adapter rated at least 5W. Avoid testing from a laptop port, monitor, or unpowered hub because those connections can make troubleshooting less clear. Leave the case connected for at least 10 minutes, even if the light does not immediately appear.
For a wireless charging case, place it centered on a compatible Qi or MagSafe charging pad. Remove thick cases, wallets, or magnetic accessories that can prevent proper alignment. A wireless pad can be convenient, but a cable connection is the better diagnostic test because it eliminates alignment as a variable.
3. Inspect and clean the case (5 minutes)
Unplug the case. Use a dry cloth on the outside, then gently brush visible lint from the Lightning or USB-C port. For the AirPod wells, use a clean, dry, soft-bristled brush. Hold the case with the openings facing downward so loosened debris falls out instead of moving deeper inside.
Do not pour cleaner into the case, spray compressed air directly into the charging wells, or use water, alcohol, pins, paper clips, or metal tweezers. Never scrape the bottom contacts. A small amount of debris can prevent an AirPod from sitting low enough to connect with the charging pins.
4. Clean and reseat each AirPod (3 minutes)
Remove the earbuds and wipe their stems and charging surfaces with a dry, lint-free cloth. Check that silicone ear tips, if fitted, are not folded or positioned in a way that keeps an AirPod from seating correctly.
Place each AirPod into its matching well and press down gently once. The magnet should guide it into position without force. Close the lid for 30 seconds, then reopen it and check the battery reading. If one AirPod charges only when you press it down, the well may still be dirty, or the internal charging contact may be worn.
5. Restart the charging setup (2 minutes)
Disconnect the case from its charger, remove the AirPods, and restart the iPhone or iPad used for testing. Reconnect the case to power, put both AirPods inside, and close the lid for another 30 seconds. This can clear a temporary battery-reporting or Bluetooth communication error.
6. Reset and reconnect the AirPods (5 minutes)
Put both AirPods in the case and close the lid for 30 seconds. On your iPhone, open Settings, tap Bluetooth, select the information button beside the AirPods, and choose “Forget This Device.” Keep the AirPods in the open case. Press and hold the setup button on the back for about 15 seconds, until the status light flashes amber and then white. On cases without a rear button, use the documented touch-control reset procedure for that model.
Hold the open case near the iPhone and follow the on-screen pairing instructions. Check the battery levels again after a few minutes of charging.
7. Update and test each component (5 to 10 minutes)
AirPods firmware updates normally install automatically while the earbuds are charging in their case, near a connected Apple device, and within Bluetooth range. Keep the case connected to power and leave the setup undisturbed for at least 30 minutes.
Then test one variable at a time: try another cable, another wall adapter, and, if applicable, another wireless charging pad. If the case charges with one cable but not another, replace the cable. If it works only on a particular pad, the issue is likely alignment or pad compatibility.
Mistakes to Avoid
- Using sharp objects: Pins and metal tools can scratch contacts, bend charging pins, or create an electrical short.
- Using liquid cleaners: Moisture can travel into the case and damage its battery or electronics. Clean only with a dry cloth or brush unless Apple specifically directs otherwise.
- Forcing the lid or earbuds: A lid that will not close may indicate debris, a misplaced ear tip, or physical damage. Do not snap it shut.
- Assuming a dead light means a dead case: The case may simply be deeply discharged. Give it at least 10 to 15 minutes on a known-good wired charger.
- Mixing incompatible parts: Confirm the AirPods generation and case model before purchasing a replacement. A case can look similar while using different charging or pairing hardware.
- Ignoring heat or swelling: Unusual heat, a raised lid, or a chemical odor is a safety warning, not a cleaning problem.
How Often
Inspect the case once a month if you carry it in a pocket or bag. Wipe visible dust from the AirPods weekly or whenever they appear oily. Clean the charging wells only when you see debris or notice inconsistent charging; excessive brushing can wear delicate surfaces over time.
For best battery longevity, avoid storing AirPods completely empty for long periods. If you will not use them for several weeks, charge the case and earbuds to roughly 50% before storage, then keep them in a cool, dry location away from direct sunlight.
When to Call a Pro or Replace
Contact Apple or an authorized service provider if an AirPod remains at 0% after cleaning, resetting, and testing with a different cable and adapter. Professional help is also appropriate when the case will not charge at all, the status light behaves erratically, or the AirPod becomes hot while charging.
Replacement may make more financial sense when the repair estimate approaches the cost of a renewed set. A renewed replacement case priced around $15 to $30 can be reasonable if the earbuds work normally and the case is the only failed component. If both earbuds have weak batteries or the case has sustained liquid or impact damage, a renewed AirPods set around $75 to $100 may be the more practical choice. Check return coverage, battery condition, model compatibility, and seller testing before buying.
FAQ
Why is only one AirPod charging?
The most common causes are debris in one charging well, an earbud that is not seated fully, or a worn contact. Clean the well and earbud with a dry brush and cloth, then reseat it. If the same side still fails with a different case or after a reset, the earbud battery or charging hardware may need service.
How long should AirPods take to start charging?
The battery percentage should usually appear within a few seconds of placing the earbuds in a powered case, but a deeply depleted case may need 10 to 15 minutes before it responds. A wired case can take approximately one to two hours to reach a high charge, depending on the model and power source.
Can I use a different charger?
Yes, use a compatible, undamaged cable and a standard USB power adapter. A 5W adapter is sufficient for testing, while common 10W, 12W, and 20W adapters are also suitable. Do not use a damaged cable, loose connector, or visibly overheated adapter.
Why does the case show a charge but the AirPods do not?
The case and earbuds have separate batteries and charging contacts. A charged case cannot transfer power if lint blocks the contacts, an AirPod is misaligned, or its internal battery has failed. Clean, reseat, reset, and test each AirPod individually before replacing the case.
Ready to decide? Our #1 pick for 2026 is the Apple-certified Lightning or USB-C charging cable.
Live price & availability on Amazon.





Write Your Review
No reviews yet. Be the first to share your experience!