
Recommended Products

PrimeAULA S99 Gaming Keyboard, Wireless Computer Keyboards, Tri-Mode Bluetooth/2.4GHz/USB-C Custom Creamy Keyboard with Number Pad, RGB Backlit Media Knob Cute Programmable Keyboard for PC Gamer – Green
PrimeAULA 99 Key Keyboard, Wireless Gaming Keyboard Bluetooth Computer Keyboards Creamy Cute with Number Pad RGB Backlit Tri-Mode BT/2.4GHz/USB-C – Pink

AULA F75 75% Wireless Mechanical Keyboard, Hot Swappable Creamy Keyboard, Pre-lubed Linear Switches, 2.4GHz/Type-C/BT5.0, RGB Backlit Gaming Keyboards(White&Brown)
As an Amazon Associate we earn from qualifying purchases. Product prices and availability are accurate as of the date/time indicated.
Creamy Keyboardenthusiasm has completely transformed the custom mechanical keyboard community over the last several years. Enthusiasts everywhere crave that deep, acoustic profile that makes every single keystroke sound like a soothing, thick drop of rain. Finding the right parts requires some knowledge of materials and mods.
Understanding the Foundations of Acoustic Design
Achieving a true creamy keyboard is about mastering how vibrations travel through different components. Every single aspect of your build, from the plate material to the internal case dampening, dictates whether your typing experience will feel hollow or wonderfully rich. Balancing these elements is the key to deep acoustics.
The Science of Sound in Mechanical Keyboards
Sound is essentially a wave of energy that propagates through the physical materials of your desk setup. When a switch bottoms out, it creates an acoustic signature that vibrates through the stem, housing, plate, and outer case. Understanding how these vibrations interact helps you target and eliminate high-pitched pings easily.
To create a deeper sound, you must focus on absorbing high frequencies while allowing lower frequencies to resonate. This process involves selecting materials that naturally dampen sharp noises without completely muting the overall typing sound. The goal is to produce a rounded, soft acoustic profile with every press you make.
Why Case Material Alters Your Sound Profile
The material of your outer case plays a massive role in shaping the final sound of your mechanical setup. Aluminum cases tend to produce a brighter, more metallic sound unless they are heavily dampened with heavy silicone or foam. Acrylic and polycarbonate cases naturally offer a much deeper, warmer sound profile from the start.
Wooden cases also provide a unique organic resonance that some custom builders find incredibly satisfying to use. However, plastic cases like ABS remain the most common budget option for those trying to achieve soft tones. Each material reflects and absorbs sound differently, requiring custom dampening strategies to master.
The Crucial Role of Mounting Styles
How your keyboard plate is secured inside the case dramatically influences both typing feel and sound production. Tray mount designs are generally stiffer and can create uneven sound spots across your alphanumeric cluster. Moving to a gasket mounted creamy keyboard design yields a much softer, highly consistent typing sound.
Gasket mounts use small rubber or foam strips to isolate the plate from direct contact with the hard outer shell. This isolation prevents vibrations from transferring directly into the desk, producing a cleaner, more isolated acoustic signature. It also offers a bouncy typing feel that reduces finger fatigue during long sessions.
Selecting the Perfect Plate Material
Plates act as the structural backbone of your switches and are highly responsible for bottom-out feel and tone. Brass and aluminum plates are stiff, resulting in high-pitched, loud clacks that can be difficult to quiet down. For a softer profile, builders usually opt for non-metal options like polycarbonate or FR4 plates.
Polycarbonate is exceptionally flexible and absorbs harsh vibrations, creating a deep, clean acoustic response. FR4 plates offer a middle ground, providing excellent structural stability with a slightly deeper sound than metal. Swapping your rigid metal plate for a flexible plastic one is a very effective way to lower pitch.
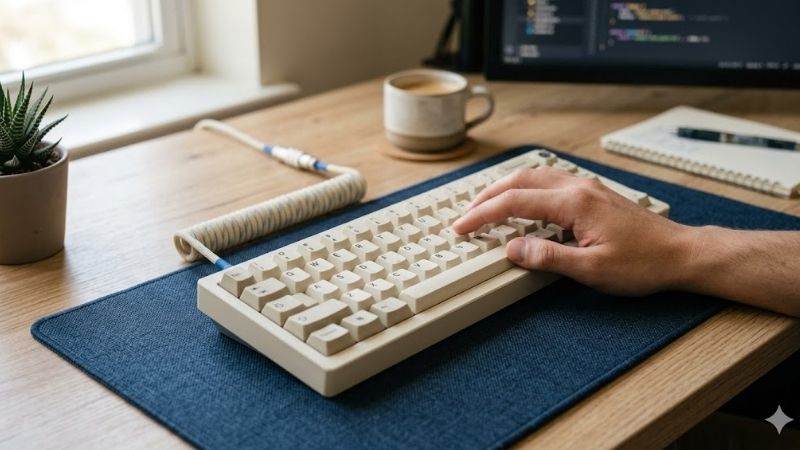
How Desk Mats Enhance Acoustic Depth
A desk mat is often overlooked, but it functions as a giant dampener for your entire typing setup. Placing your custom build directly on a hard wooden or glass desk surface allows vibrations to amplify throughout the room. A thick mat absorbs these vibrations, instantly deepening the acoustic tone of every single keycap strike.
For the absolute best acoustic isolation, choose a desk mat that is at least four millimeters thick with a high-density rubber backing. Some enthusiasts even stack multiple mats or use wool felt pads to achieve an incredibly muted, soft sound profile. This simple external addition is effective for refining your overall acoustics.
Choosing Switches and Stabilizers for Deep Acoustics
Constructing a dreamy creamy keyboard setup requires paying close attention to your switches and stabilizers. These tiny moving parts are the primary source of sound, meaning that poor choices here will ruin even the best cases. Selecting pre-lubed components can save you hours of meticulous and repetitive manual labor.
| Plate Material | Flexibility Level | Primary Acoustic Signature | | Polycarbonate | Extremely High | Soft, Low-Pitched, Quiet | | FR4 Fiber | Moderate | Balanced, Warm, Mellow | | Aluminum | Low | Loud, High-Pitched, Crisp | | Brass | Extremely Low | Bright, Sharp, Resonance |
Linear versus Tactile Switches for Soft Sounds
Linear switches are widely preferred for deep sound profiles because they have a completely smooth travel path. Without a tactile bump to create extra noise, the sound is purely determined by the bottom-out and top-out of the stem. This simplicity allows the natural characteristics of the switch plastic to shine through.
Tactile switches can still produce wonderful sounds, but their tactile feedback introduces a secondary noise. Clicky switches should be entirely avoided if you are chasing a mellow acoustic tone, as they are designed to be loud. Focus on smooth linears with moderate spring weights for the most consistent sound results.
Understanding Switch Housing Materials
The plastics used in switch housings play a decisive role in defining the frequency of your keystrokes. Nylon housings are legendary for producing a very deep, warm sound signature that dampens high-pitched frequencies. Polycarbonate housings, conversely, produce a much sharper clack that is ideal for brighter setups.
POM is another outstanding material that is favored for its incredibly low coefficient of friction. This material self-lubricates over time, ensuring that your switches actually become smoother the more you use them. Blends of these materials are also popular, offering customized acoustic options for builders.
The Art of Tuning Keyboard Stabilizers
Stabilizers keep your larger keys, like the spacebar and shift keys, from wobbling or tilting when pressed. However, untuned stabilizers are the most common source of annoying rattling and ticking sounds in any custom build. Standard plastic inserts can rattle against the outer housing, completely ruining your acoustic profile.
To fix stabilizer rattle, you must apply heavy grease to the metal wires and apply modding tape to the printed circuit board. This process cushions the impact and ensures that the metal wire does not make direct, noisy contact with the plastic. Taking time to tune these stabilizers will dramatically improve your final sound.
Factory Pre-Lubed versus Hand-Lubing
Lubricating your switches is the absolute most effective way to eliminate friction scratchiness and deepen switch acoustics. Hand-lubing each individual switch takes hours of patient work with a tiny brush and specialized grease. For many hobbyists, this manual process is a therapeutic rite of passage for their custom build.
Fortunately, factory pre-lubed switches have vastly improved in quality over the last few years. You can now purchase switches that sound excellent right out of the box, allowing you to assemble your creamy keyboard quickly. Hand-lubing remains superior for perfectionists, but pre-lubed options are incredibly convenient.
Choosing the Right Switch Spring Weight
Spring weight plays a surprisingly subtle role in how your switches sound and feel when typing quickly. Lighter springs require less force to actuate, which can sometimes lead to a faster and lighter bottom-out sound signature. Heavy springs require deliberate force, preventing aggressive bottoming out and dampening harsh noises.
Additionally, progressive springs provide increasing resistance as they are pressed deeper into the switch housing. This progressive resistance cushions the final impact, resulting in a much softer bottom-out acoustic signature. Choosing the right spring weight ensures that your switches feel as smooth as they sound to your ears.
Keycaps and Essential Dampening Modifications
Finishing your custom creamy keyboard involves choosing the right keycap profile and adding dampening modifications. These elements represent the final layers of sound filtering, turning raw switch clacks into soft, rounded tones. Applying simple modifications can dramatically elevate even a budget-friendly starter setup.
How Keycap Profile Affects Pitch and Feel
Keycap profile refers to the shape, height, and sculpt of the plastic caps that cover your switches. Taller profiles, like SA or MT3, have a larger internal chamber that naturally produces a deeper, echoic sound. Lower profiles, like Cherry or OEM, offer a more concentrated sound that is highly preferred for daily typing.
Shorter profiles are also generally easier to type on for extended periods because they require less finger extension. If you prefer a balanced experience, Cherry profile is the industry standard for combining comfort with clean acoustics. Experimenting with different heights will help you find your personal comfort zone.
Deciding Between ABS and PBT Keycaps
The plastic formulation of your keycaps is just as important as their shape for acoustics. PBT keycaps are dense, textured, and resistant to developing a shiny finish from finger oils over time. They naturally produce a lower, deeper acoustic profile that matches very well with quiet, cushioned switches.
ABS keycaps are typically smoother and can produce brighter, sharper sounds when you strike them quickly. However, high-quality double-shot ABS keycaps can still sound wonderfully rich if they are sufficiently thick. Thick walls, usually around 1.5 millimeters, are absolutely essential for achieving a premium sound profile.
The Tape Mod and PE Foam Mod Explained
The tape mod involves applying several layers of blue painter tape directly to the back of your printed circuit board. This simple mod acts as a low-pass filter, absorbing high-pitched clacks while accentuating deeper tones. It is one of the most inexpensive and effective ways to completely alter your keyboard sound.
The PE foam mod involves placing a thin sheet of polyethylene packaging foam directly between your switches and the printed circuit board. This modification produces a distinctively marble-like popping sound that many modern enthusiasts love. It is a popular technique for achieving extremely clean sound signatures.
Case Foams and Silicone Pour Dampening
To eliminate hollow echoes inside your keyboard case, you need to fill the empty space underneath the circuit board. Placing specialized case foam, like Poron or EVA foam, inside the bottom housing absorbs unwanted internal sound reflections. This simple addition creates a much more solid, premium-feeling typing device.
For the ultimate dampening solution, some builders use liquid silicone to create a custom-molded dampener. This silicone pour adds substantial physical weight to your build, preventing it from sliding around on your desk during use. A heavier case naturally vibrates less, resulting in a cleaner, more focused acoustic signature.
The Tempest Tape Mod Safety and Best Practices
While the tempest tape modification is highly celebrated for its acoustic benefits, it requires careful execution to avoid damage. Using conductive tape or applying it to boards with lithium batteries can occasionally present safety risks. Always use non-conductive blue painter tape to ensure your electronic components remain safe.
Applying two to three layers is generally considered the sweet spot for achieving a balanced, deep acoustic response. Adding too many layers can choke the sound entirely, leaving you with a lifeless and overly muted typing experience. Keep your layers neat and trim any excess overhang around the edges for a clean installation.
Find out more:
Conclusion: Building Your Dream Acoustic Setup
Embarking on the journey to build your own creamy keyboard is an incredibly rewarding experience for any desk setup enthusiast. By carefully selecting flexible plates, dampening materials, and smooth switches, you can easily achieve that perfect sound. Take your time, enjoy the process, and listen to your custom creation come to life.
Top picks from this guide
 typecasetypecase Touch iPad 11th 10th Generation Case with Keyboard (11"…$65 \xc2\xb7 97/100
 LENRICHKeyboard Case for iPad Pro 12.9 inch 6th Generation 2022…$70 \xc2\xb7 96/100
 ESR iPad 11th(A16, 2025)/10th Gen Case with Keyboard, Magic Keyboard…$80 \xc2\xb7 95/100
 BABGBABG Keyboard Case for iPad Air 13 inch(M3/M2)&iPad Pro 13(M5/M4),iPad…$60 \xc2\xb7 95/100

: A Great Mac Alternative")
: A Fun Yet Practical Workhorse")
: Chic iPad Partner")
: Sleek Mac Upgrade")


: Silent Typing")
: Ultimate Quiet macOS Typing")
Write Your Review
No reviews yet. Be the first to share your experience!